Connecting to a Network File Share or NAS Drive (Windows)
Follow these instructions to connect to a file share or NAS drive in Windows. From off campus, first connect to Pulse Secure or use Remote Desktop.
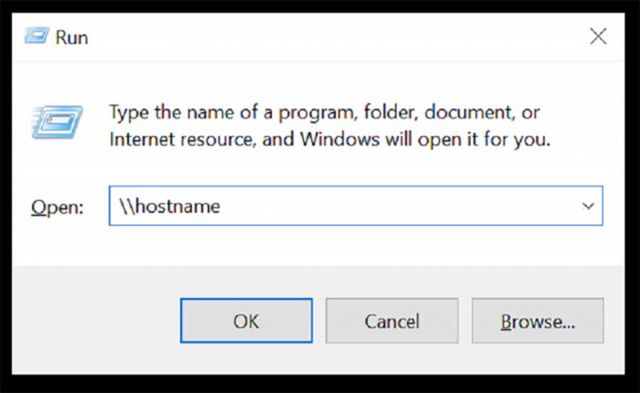
Open Run and type hostname
1. Open Windows Run by pressing Windows Key + R. Type "\\" followed by the hostname of the drive.
Common Hostnames are "lifesci-filer.lifesci.ucsb.edu" and "faculty-nas1.[eemb or mcdb or nri].ucsb.edu" (example: cheadle-nas1.eemb.ucsb.edu).
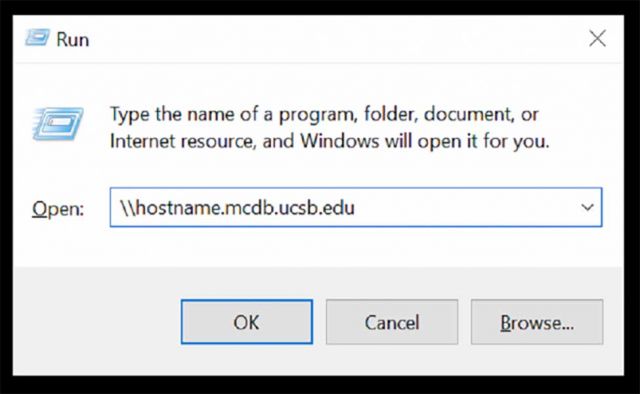
Type extension
2. Add the appropriate extension (eg. ".mcdb.ucsb.edu", ".eemb.ucsb.edu", ".nri.ucsb.edu"). Click "OK".
If you have any questions about your Fully Qualified Domain Name, contact Computer Support at help@lscg.ucsb.edu.
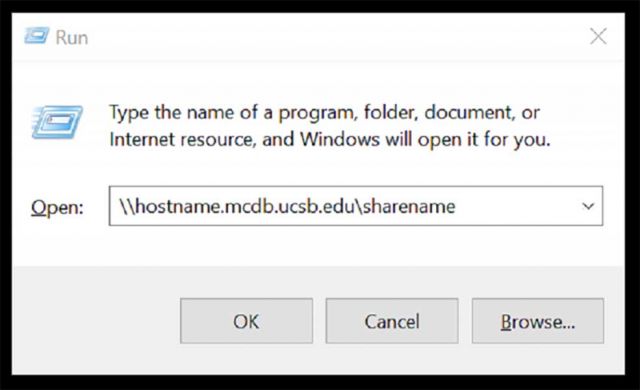
Type share name
3. OPTIONAL: If you know the share directory beforehand, type "\" followed by the name of the directory.